|
BUILDING THE BLACK GATE
Part two: The Gatehouse
© Lotrscenerybuilder 2009
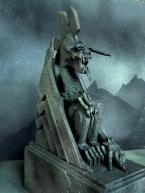
…And now near loomed the great rampart of Cirith Gorgor.
In the Appendices of the Two Towers (Part Four), there seems to be a little confusion between script writer Philippa Boyens and the designers of Weta about the actual number of gates in the Black Gate. And indeed there's room for different interpretations if one reads the books of J.R.R. Tolkien:
"… the Dark Lord had built a rampart of stone.
In it there was a single gate of iron…"
(The Two Towers, page 302)
"The two vast iron doors of the Black Gate under its frowning arch were fast closed"
(The Return of the King, page 196)
"And thereupon the middle door of the Black Gate was thrown open with a great clang…"
(The Return of the King, page 197)
In the end, according to Philippa Boyens, the modellers of Weta settled for the assumption that the Morannon as a whole formed a single gate, with two giant doors situated in the middle of the fortress.
.jpg)
"The Gatehouse" is the second in a series of three articles which tell you step by step how to construct this miniature of the Black Gate. This time we will explain to you how to build the battlements on either side of the door wings as well as the hinge-towers in between. The third article will deal with the watchtowers and the lateral walls that link them to the proper gate.
The templates that you need for the gatehouse can be found HERE
| Materials used: |
Cardboard (1mm thickness & 2 mm thickness) |
|
MDF (4mm thickness) |
|
Cocktail-sticks (party pack) |
|
Four skewers |
|
Wood glue |
|
Painter's tape |
|
Structure paint (for us: "Decofit-P") |
|
Black paint (for us: ColorWorks "Anthracite" spray can) |
| |
Filler |
| Tools used: |
Fretsaw (for us: "Skandia", saw blade no. 6) |
|
Handsaw |
|
Hobby knife |
|
File |
|
Sand paper (fine grain) |
|
Scissors |
|
Set square |
|
Ruler (for drawing and cutting) |
|
Brush |
|
Work table (optional) |
|
Filling-knife (optional) |
Small chance of success… what are we waiting for?
We take it that you went through the first article already and that you have finished at least one sample of the "Gateway" doors (you're gonna need two of them in the end to complete the gate). By now, you are familiar with the first six building steps, as well as with the accompanying construction techniques. This allows us to make bigger strides through the building process as we continue with the next chapter. The structure of the "Gatehouse" is basically identical to that of the Gateway; it has the same ornaments all over. But there are some minor differences, as well as a few additions. You might want to consult the first article now and then.
Step 7:
First thing we do is to build a new framework. We are going to produce a front- and a back panel of MDF, along with three small vertical connecting strips. Also we will cut out two pieces of cardboard and have them transformed into 'harmonica'-sheets.
.jpg)
Copy the Legolas A (front) template onto 4mm MDF (you may want to do the drawing by yourself, but the simplest way is to cut out the template and glue it directly onto the MDF). Note that the positions of the cardboard harmonica elements of Gandalf (white) and Aragorn (green) are marked on the template; note also that there is a black boundary line between them.
Copy also the Legolas B (back) template of the frame, as well as the connection strips of Legolas C (2X) and Legolas D onto 4mm MDF. Note that the positions for the strips are marked in grey on the Legolas B template.
Have all elements slightly sanded. Next, glue the three connection strips at their proper places onto the Legolas B element (study the picture). Glue the Legolas A front-element into position. Make sure that the frame is able to stand dead straight; at the same time, check the alignment with your finished "Gateway" element. Make adjustments if necessary.
.jpg)
Copy the Aragorn A and Gandalf A templates onto 1mm cardboard. This time we recommend you to do the drawing manually. Use a red pencil for the incision lines. Also, copy all dotted guidelines. In order to obtain the 'harmonica' pattern we have to copy the Aragorn B and Gandalf B templates onto the back of both elements. Note that we have already reorientated these templates for you: left-right has become right-left. Make sure that the red incision lines do form an alternating pattern on the front side and the back (see also: Step 1).
Bend all strips back and forth into the familiar 'harmonica'-shape. Press them tightly together to obtain the optimal effect; notably the Aragorn sheet rises to the challenge. A Japanese fan is what we want to hold. When the bending is complete we want you to make a small cut into the last strip on the right of the Aragorn element, at the height of 9.4cm (the spot is marked on the template).
.jpg)
We're going to fix both elements onto the MDF frame as follows:
- glue the left 0.55cm grey Aragorn-strip onto the dark green strip on the frame;
- glue the right 0.8cm grey Gandalf-strip to the side of the frame (as in: Step 2);
.jpg)
- stretch out the Aragorn element up to the black boundary line and glue the strips to the frame (study step 2 for the correct way to do so); glue the upper part against the side of the frame; take care you keep the harmonica ribs in shape, especially the one on the right with the 'halfway' cut (study the pictures);
- in the same way, stretch out the Gandalf element and glue the strips to the frame, with the end strip touching the Aragorn element.
- mask the incisions in the cardboard by using painter's tape; use 0.6cm x 8.0cm strips for the Gandalf element and 0.6cm x 17.0cm strips for the Aragorn element (see also: Step 2).
.jpg)
Cut out seven more Gimli Small elements. Glue them into place as shown at the picture, i.e. "into" the first seven valleys counted from the right (see also: Step 3). Note that in the future, rocks are going to cover the wall beyond the last Gimli element.
Mask the incisions in the cardboard of the Gimli elements by using 0.6cm strips of painter's tape.
Cut out eleven more Pippin elements and glue them into position onto the frame (see also: Step 4).
Cut out sixteen more Merry elements. Eleven of them are going to be glued onto the frame along the horizontal 5.8cm guideline (see also: Step 4). Note that the first Merry on the right has to be fixed 'around the corner'.
The remaining Merry's are going to be glued along the diagonal guideline, in such a way that their left wing-tip is touching the line (study the picture); however, we will leave out the fifth Merry until the moment arrives to put the parapet into place.
Mask the incisions in the Merry elements by using 0.6cm strips of painter's tape (don't cover the front spikes). We use tape-lengths of 2.5cm for the first eleven elements and tape-lengths of 3.5cm for the remaining elements. We want to have it look like if the Merry element 'is blending into' the frame rib.
|